
This document is a step by step guide to deploying your custom Apache Jetspeed-2 portal and portlet applications on a Websphere Application Server. This solution provided here is tested on Websphere version 6.1.
For building a Jetspeed Portal, please read the accompanying documents "Building Jetspeed for Websphere with Maven-1" and "Building Jetspeed for Websphere with Maven-2".
Jetspeed is an open source project, thus all source code is freely available from Apache. See the website for more details: http://portals.apache.org/jetspeed-2/.
This document will teach you how to deploy a Jetspeed Portal and one or more portlet applications to Websphere in a web application archive or an enterprise archive (EAR).
The custom portal used in this document is an example tutorial portal named Jet Express. Jet Express is a customized version of the Jetspeed portal. Additionally, we will deploy the Jetspeed Administrative portlet application and a sample portlet application named Express Demo. The purpose of using a sample custom portal is to teach you how to deploy your own custom portal for a production system.
There are benefits to both approaches. Deploying the Jetspeed portal as a WAR may be a better approach for incremental development of portlet applications. By deploying Jetspeed as a WAR file once, you will not have to redeploy it as often as your portlet application(s). This can separate the deployment cycle of your portlet application from the Jetspeed portal’s deployment cycle.
The benefits of deploying an EAR are:
The procedure for deploying as all WAR files is different from the procedure for deploying in a single EAR file.
The WAR procedure is defined in section 4.
The EAR procedure is defined in section 5.
The third choice is to deploy Jetspeed and the Jetspeed Administrative application as an EAR file, and then deploy your portlet applications as external EAR files. See section 6 for details on deploying two or more EAR files.
This guide assumes that you are using Websphere version 6.1. Although Jetspeed run on Websphere 5.x, and Websphere Express, this guide is targeted specifically to the Websphere 6.1 environment.
If you are running version 6.1.0.0 or version 6.1.0.1, Fix Pack 2 must be installed in order for Jetspeed to run. Without this fix pack, portlets can not be correctly rendered. Download the fix pack from here:
http://www-1.ibm.com/support/docview.wss?rs=180&uid=swg27004980#ver61
Installing the fix pack will require the installing the IBM Update Installer program.
Start up Websphere. Go to the administrative console with a web browser, and verify that you are running the correct version of Websphere.
http://localhost:9060/ibm/console/
You should a split page, with navigations on the left, and details on the right. Click on the first navigation on the left-hand-side: "Welcome".
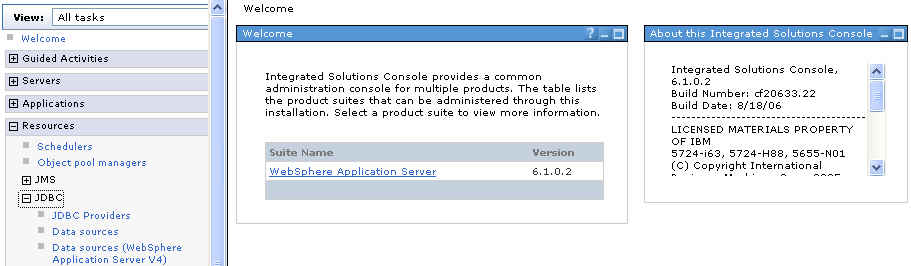
Ensure that you are running the correct version of Websphere, 6.1.0.2 or higher:
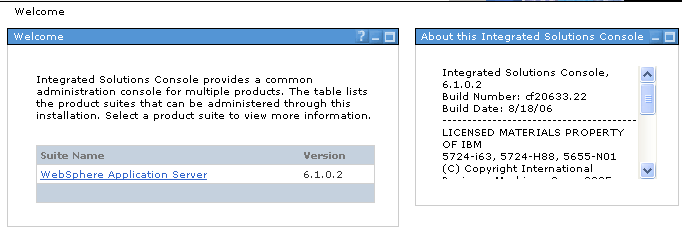
Websphere must be running version 6.1.0.2 or higher. If you are on version 6.1.0.1 or lower, then please follow the instructions in section 2.1 before continuing.
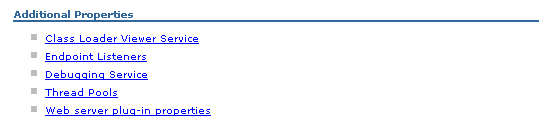
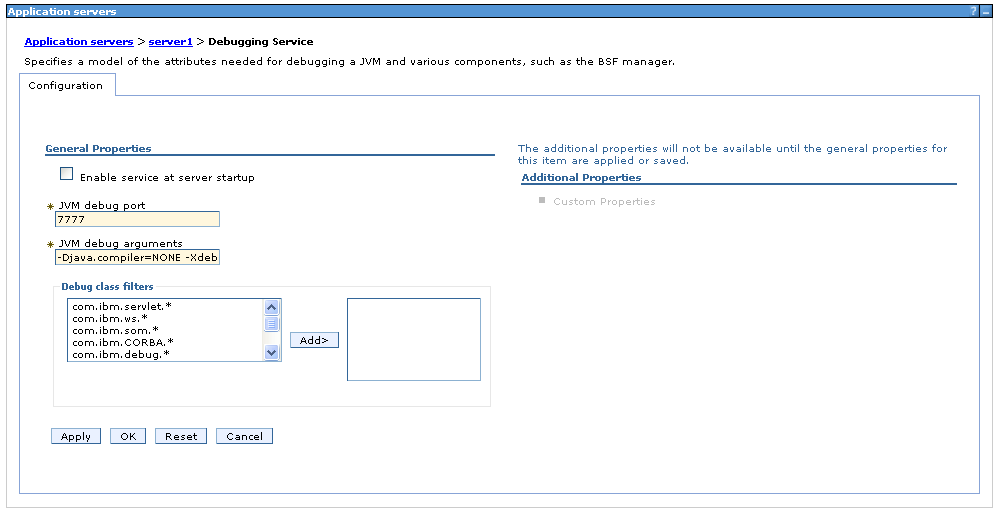
If you would like to attach to Websphere with Eclipse or RAD, you can turn on debugging to debug your portlets. Navigate to the Servers -> Application servers menu; select the server you would like to debug. Under the Additional Properties section, click on Debugging Service link.
From here you can enable debugging by clicking Enable service at server startup, press OK, and then restarting your server:
Jetspeed requires a relational database for storing portlet information such as portlet preferences, pages, and the portlet registry. Jetspeed supports many of the most popular commercial and open source databases including:
In this example, we will configure an Oracle JDBC data provider. Before proceeding, please configure a Jetspeed database in an Oracle instance. Make sure that you have already:
org.apache.jetspeed.production.database.default.name = oracle
org.apache.jetspeed.production.database.url = jdbc:oracle:thin:@localhost:1521:fep
org.apache.jetspeed.production.database.driver = oracle.jdbc.driver.OracleDriver
org.apache.jetspeed.production.database.user = fep
org.apache.jetspeed.production.database.password = xxxxx
org.apache.jetspeed.production.jdbc.drivers.path = ${was.root}/lib/OptionalLibraries/oracle/ojdbc14.jar
First, create a user identity and password in the JAAS Java 2 connector. Navigate to the "Security" menu in the LHS menu of Websphere:
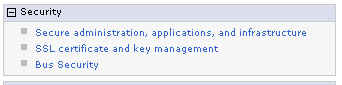
Select "Secure administration, applications, and infrastructure", which leads to the Authentication page. Expand the "Java Authentication and Authorization Service" section:

Select "J2C authentication data"... to create a new JAAS J2C User identity, select "New":
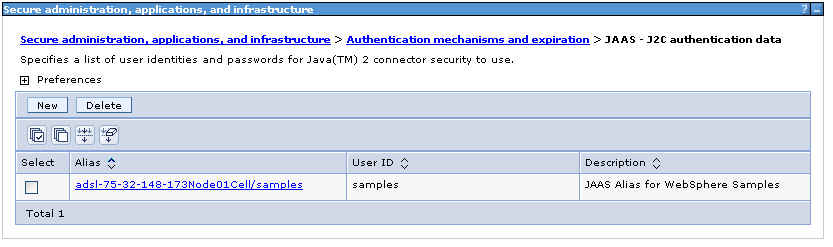
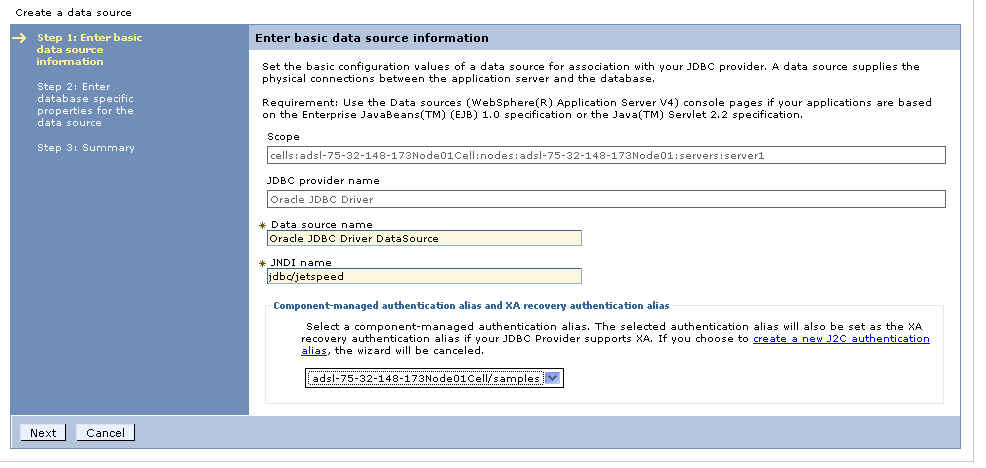
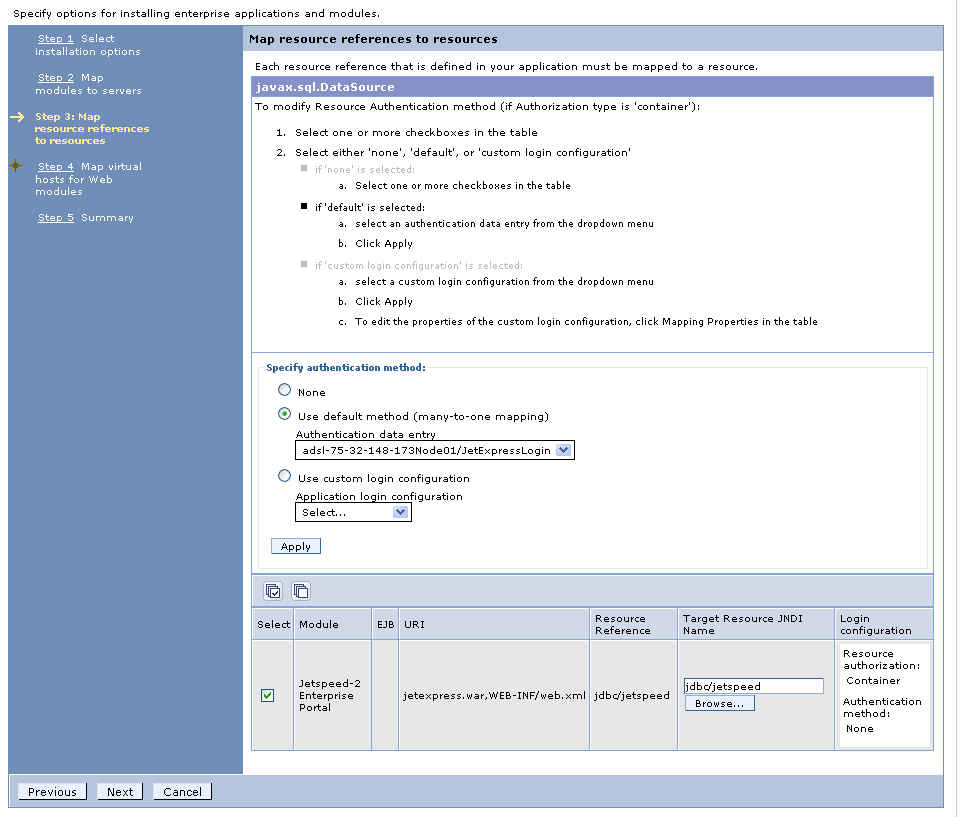
And then enter your credentials. Note we have called the user alias "JetExpressLogin". It is not required to name it "JetExpressLogin"; but make sure you use the same name when configuring your JDBC data source in the next section.

Press OK, and complete the Save dialogs.
In the default configuration of Jetspeed, Jetspeed prefers to get its database connections from a connection pool provided by the application server using a JNDI name. This section demonstrates how to configure a Websphere 6.1 JDBC Data Provider. In Websphere, a data provider can hold one or more data sources. Jetspeed actually connects to the data source, but first we need to define a generalize data provider.
Second, navigate to the "Resources" menu in the LHS menu of Websphere:
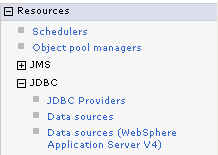
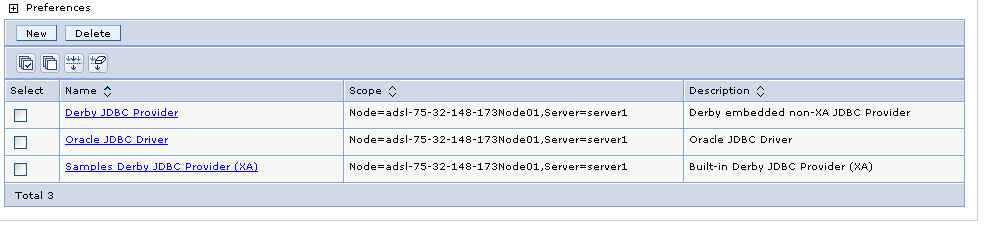
Click on JDBC Providers, you should see some a list of all your pre-installed JDBC providers. If you have already installed an Oracle JDBC provider, skip to the next section on configuring a JDBC Data Source. Otherwise, click "New" as shown below:

We can then create a new Oracle JDBC provider:
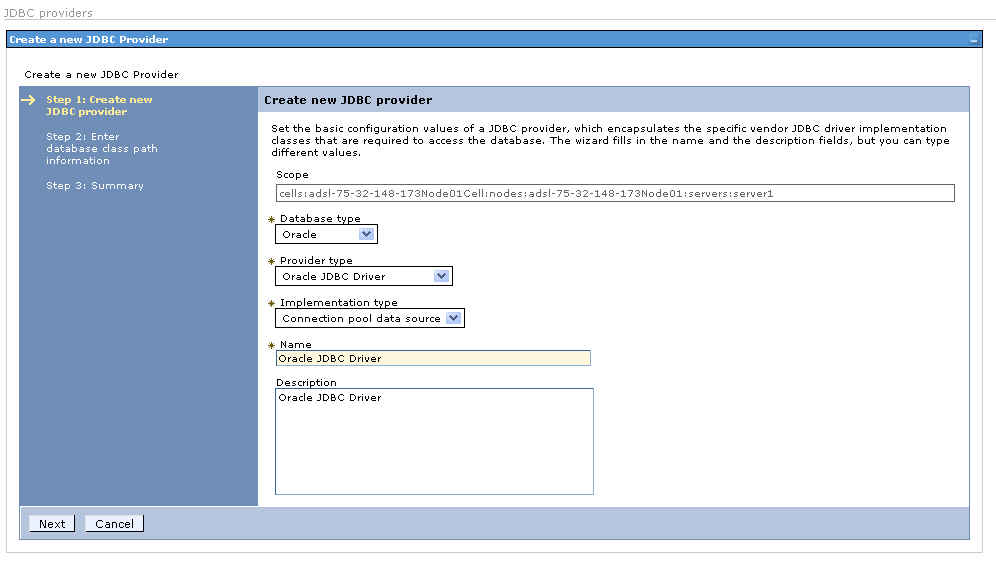
Select the "Database type" of Oracle, provider type of "Oracle JDBC driver", and "Connection pool data source". Give the provider a name or use the default values (Oracle JDBC Driver).
Make sut that you have a driver configured in Websphere:

Here we hard-coded the path to a driver that we downloaded from Oracle and installed onto our system:
/opt/IBM/WebSphere/AppServer/lib/ext/ojdbc14.jar
Click next, and go with the default values for everything else. When you get to the end, press "Finish" and then "Save" as shown below:

You should now see Oracle in the list of known JDBC providers on Websphere:
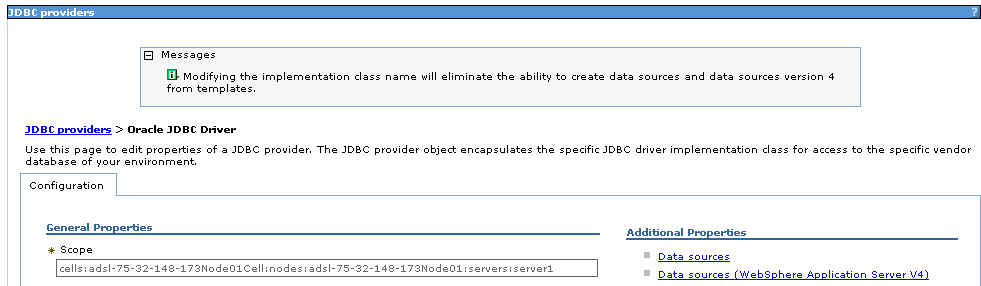
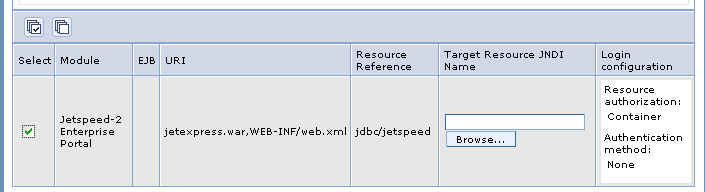
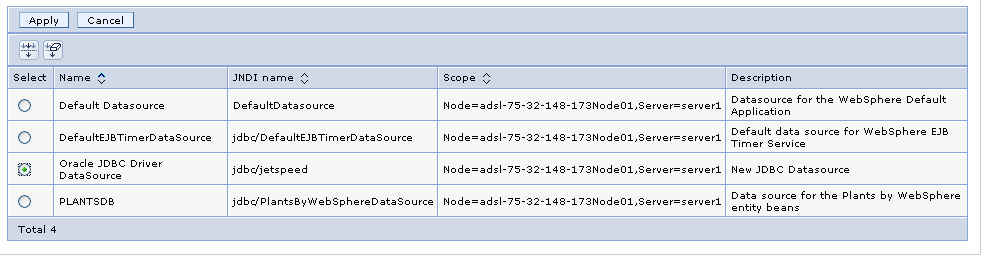
Next, we will need to create an Oracle data source. Before continuing with this step, please make sure to properly configure your Oracle database as described in section 3. Navigate to the Oracle JDBC provider, and click on "Data sources" in the Additional Properties area:
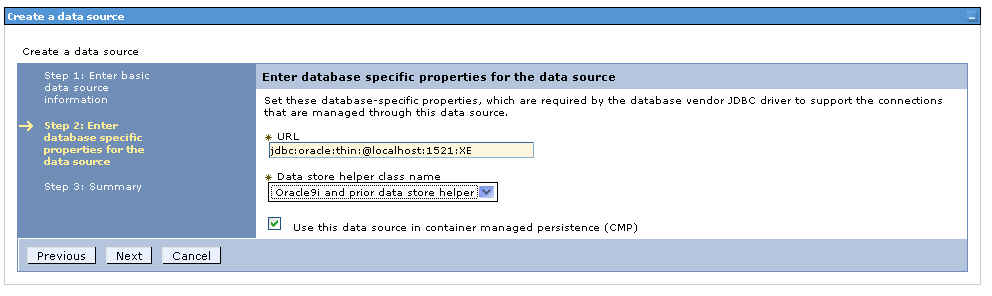
Enter:
jdbc:oracle:thin:@localhost:1521:XE
This section covers deploying Jetspeed to Websphere with WAR files. If you prefer to deploy using EAR files, skip down to section 5.
The deployment artifacts are created developers or a build team. In this example, we will assume that you have used the demo custom portal "Jet Express". See the accompanying build documents for instructions on how to build the Jet Express portal artifacts.
The WAR file deployment for Jet Express consists of three war files:
The following jar files must be in a shared class loader used by Jetspeed and all portlet applications:
The 6th jar file, derby-10.1.1.0.jar, should not be copied in. If you are going to use the Derby (Cloudscape) database with Jetspeed,
create a JDBC data source in Websphere and connect it into Jetspeed via the JNDI procedure described in section 3.
These 6 files are creating during the build process described in the accompanying build document.
Websphere 6 has a new feature specifically for sharing libraries (jars) amongst applications. Websphere has a directory for storing shared libraries. Your Websphere installation should have a directory: ${WAS_INSTALL_ROOT}/optionalLibraries/Apache/.
Create a directory underneath the Apache directory named "Jetspeed-2":
${WAS_INSTALL_ROOT}/optionalLibraries/Apache/Jetspeed-2/jetspeed-api-2.1-dev.jar
cd ${WAS_INSTALL_ROOT}/optionalLibraries/Apache
mkdir Jetspeed-2

Here we create a new Shared Library for use by deployed applications:
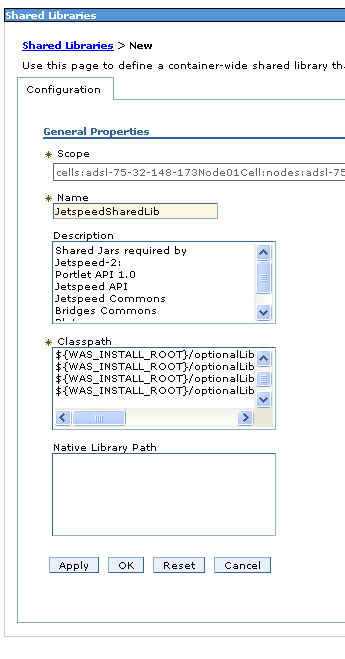
Make sure to enter the five jars into the Classpath multi-line edit as shown above, with a CRLF to separate each jar file:
${WAS_INSTALL_ROOT}/optionalLibraries/Apache/Jetspeed-2/jetspeed-api-2.1-dev.jar
${WAS_INSTALL_ROOT}/optionalLibraries/Apache/Jetspeed-2/jetspeed-commons-2.1-dev.jar
${WAS_INSTALL_ROOT}/optionalLibraries/Apache/Jetspeed-2/pluto-1.0.1.jar
${WAS_INSTALL_ROOT}/optionalLibraries/Apache/Jetspeed-2/portals-bridges-common-1.0.jar
${WAS_INSTALL_ROOT}/optionalLibraries/Apache/Jetspeed-2/portlet-api-1.0.jar
In order to share the Jetspeed shared libraries installed in section 4.2 system-wide across WAR or EAR deployments, you will need to add a shared library reference to the application server’s class loader. This shared library reference points to JetspeedSharedLib shared library configured in section 4.2.
To install a shared library reference, go to the Server -> Application servers menu:
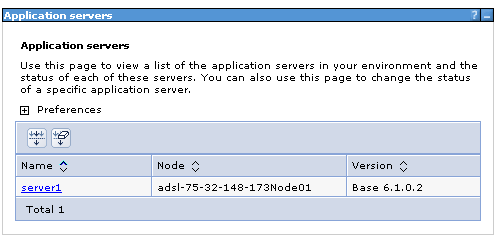
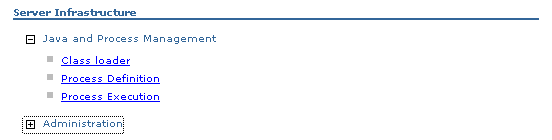
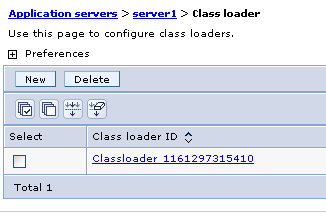
Select the server to install Jetspeed on, and then expand the Java and Process Management item on the right side of the page, then click Class loader:
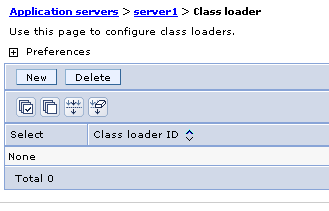
From the Class loader page, click New:
On General Properties, set Class loader order to Classes loaded with parent class loader last:
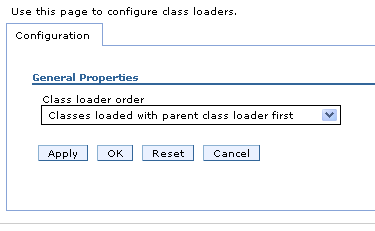
Click OK, and then Save. Click on your new Class loader:
Click on the Shared libraries references link:
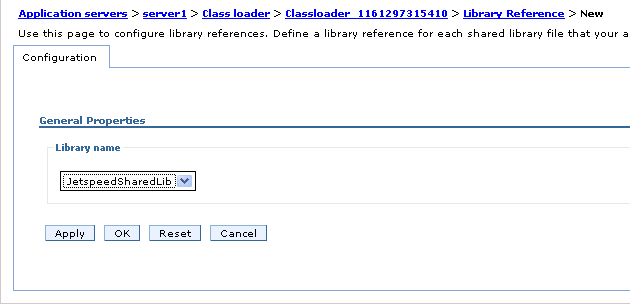
Created a new shared library reference by clicking New:
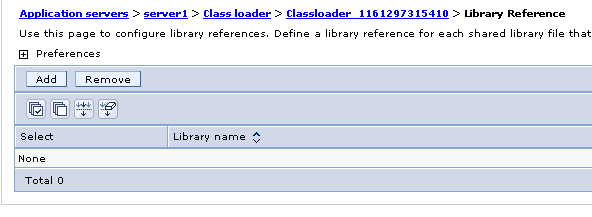
Select the JetspeedSharedLib library name, press OK and continue with saving to the master configuration.
You are now ready to deploy the Jetspeed portal and portlet application WAR files.
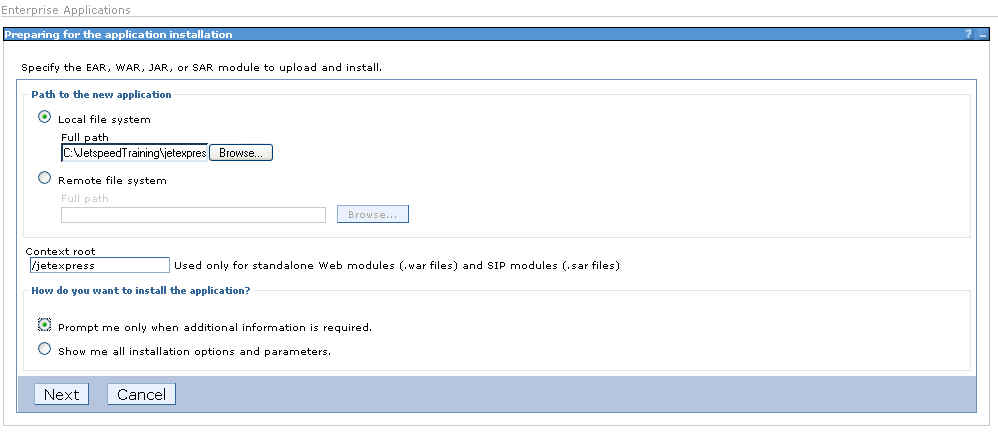
The next step is to install the Jetspeed Portal WAR file. Jetspeed must always be installed and running before attempting to install any portlet applications. In our example, the name of the jetspeed war file is "jetexpress.war".
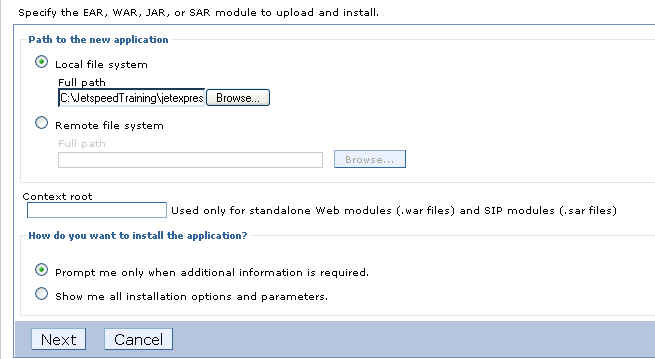
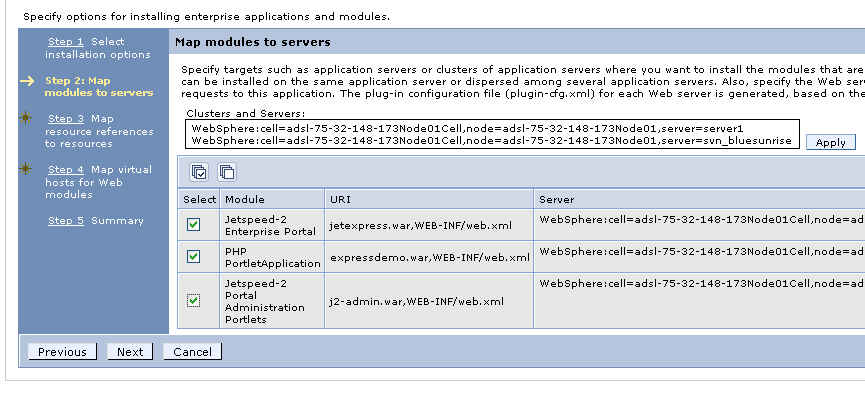
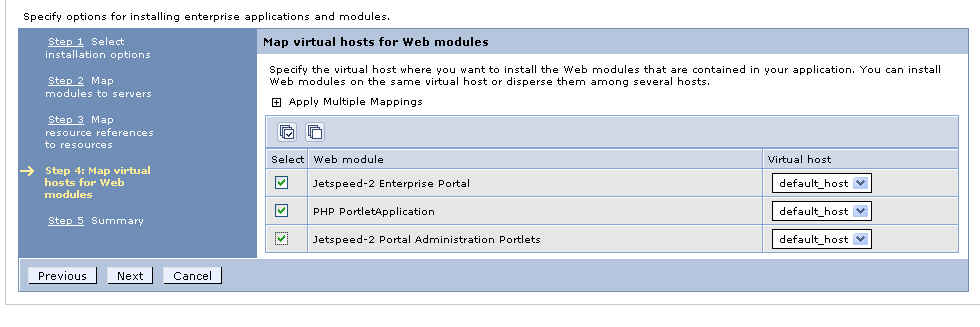
Navigate to Applications -> Install New Application:
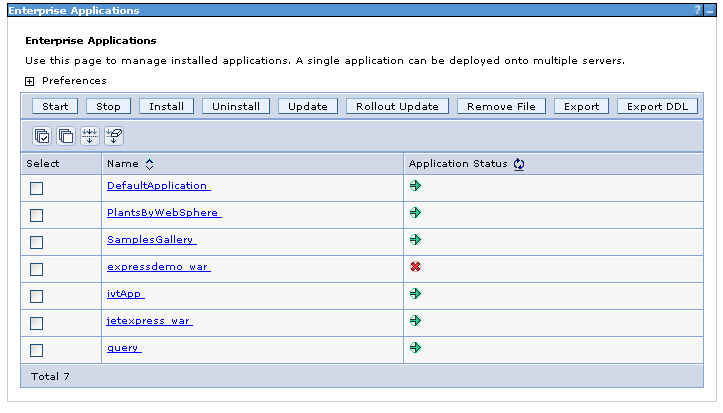
If you go to the Applications -> Enterprise Applications page, you should see your application deployed:

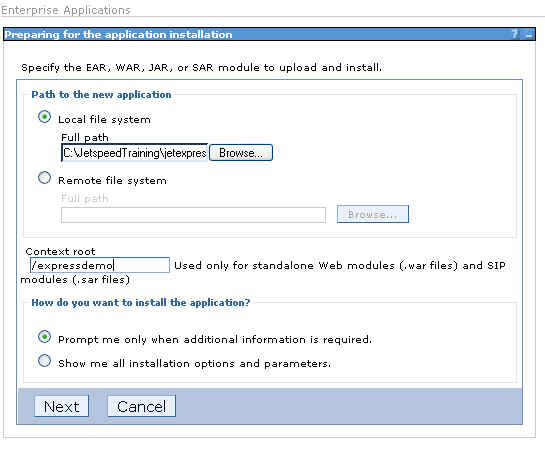
Here we will install the Jet Express demo portlet application. This procedure is the same for all portlet applications. In our example, the name of the application war file is "expressdemo.war".
Navigate to Applications->Install New Application:
If you go to the Applications -> Enterprise Applications page, you should see your application deployed:
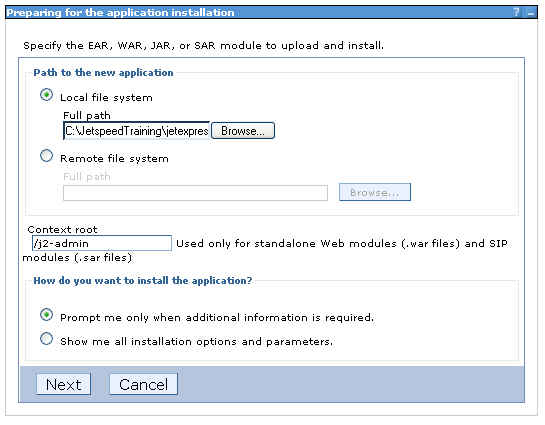
Here we will install the Jetspeed Admin portlet application. This procedure is the same for all portlet applications. In our example, the name of the jetspeed war file is "j2-admin.war".
Navigate to Applications -> Install New Application:
If you go to the Applications -> Enterprise Applications page, you should see your application deployed:
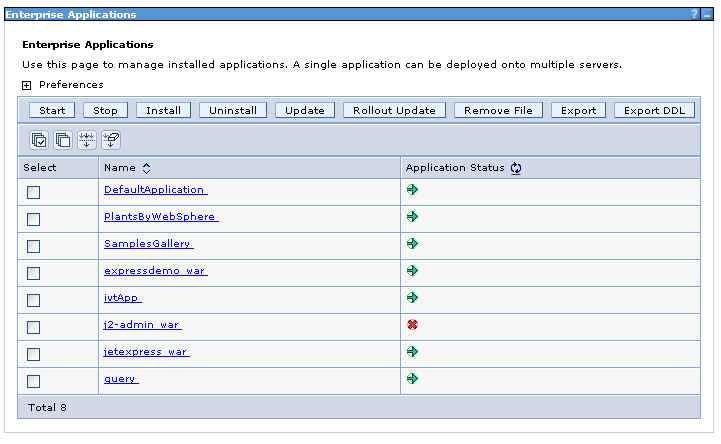
From the Applications -> Enterprise Applications menu, you can start and stop all of your deployed applications. Start the Jetspeed application (jetexpress_war) first by clicking the checkbox next to it then pressing Start.
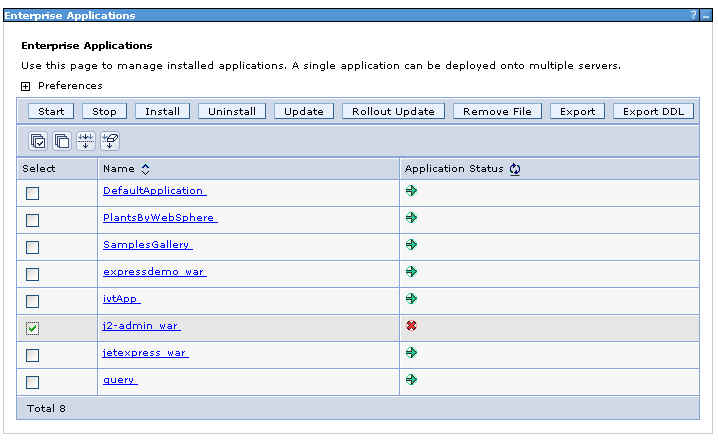
Once you see all "green statuses", you are then ready to test your portal.
Go to this link:
http://localhost:9080/jetexpress/portal
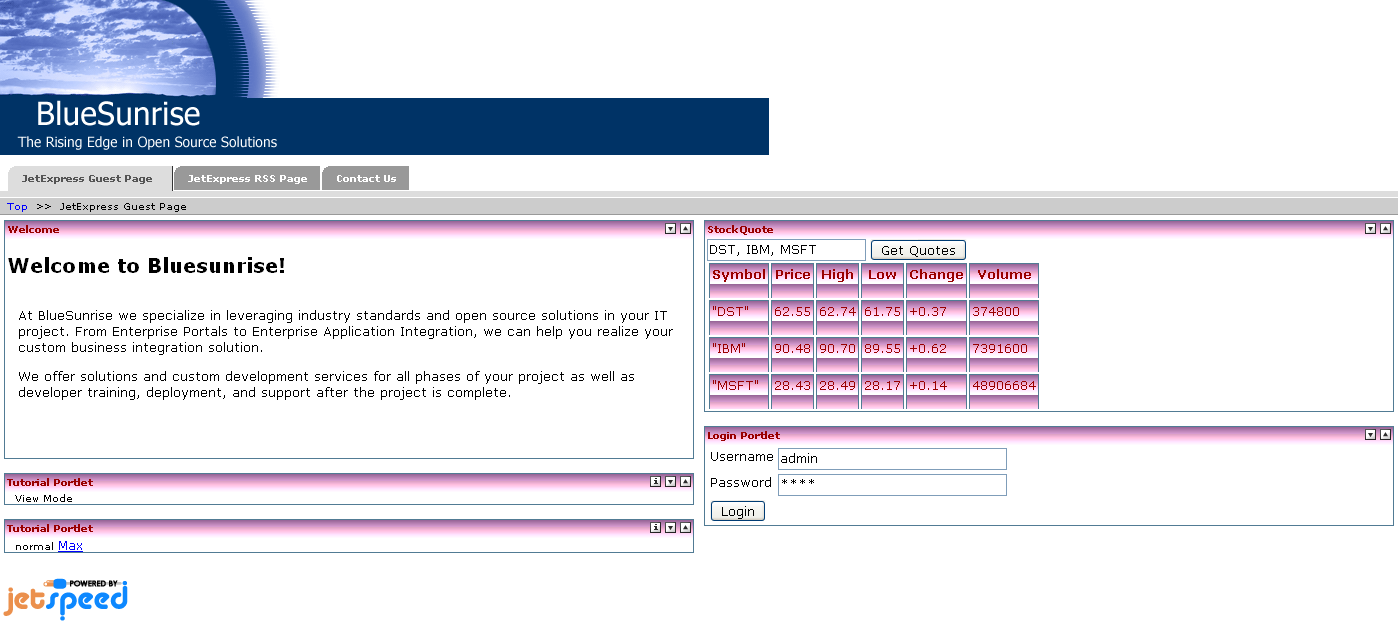
You should see the example Jet Express custom portal:
This section covers deploying Jetspeed to Websphere within one EAR file. If you prefer to deploy using WAR files, go to section 4.
The deployment artifacts are created by developers or a build team. In this example, we will assume that you have used the demo custom portal "Jet Express". See the accompanying build documents for instructions on how to build the Jet Express portal artifacts.
The EAR file deployment for Jet Express consists of one EAR file:
The EAR File contains:
The following jar files must be in a shared class loader used by Jetspeed and all portlet applications:
With an EAR file, shared jar files can simply be placed in the root of the EAR distribution. These files are then shared in the same class loader across all web applications deployed in this EAR distribution.
The 6th jar file, derby-10.1.1.0.jar, should not be copied in. If you are going to use the Derby (Cloudscape) database with Jetspeed, create a JDBC data source in Websphere and connect it into Jetspeed via the JNDI procedure described in section 3.
The shared jar files are creating during the build process described in the accompanying build document. The build will automatically place the shared jar files into the root of the EAR file. In fact, all three WAR files are also contained in the root of the EAR file. Thus the EAR file contains 5 jar files and 3 war files in the root directory, and one deployment descriptor under the META-INF directory (application.xml).
The EAR file should look something like this:
META-INF/
META-INF/MANIFEST.MF
expressdemo.war
j2-admin.war
jetexpress.war
jetspeed-api-2.1-dev.jar
jetspeed-commons-2.1-dev.jar
pluto-1.0.1.jar
portals-bridges-common-1.0.jar
portlet-api-1.0.jar
META-INF/application.xml
If you deploy the shared jar files into your EAR file, you will want to remove any application server-wide shared libraries such as the one configured in section 4.3 #Add a Shared Library Reference to the Application Server Class Loader.
EAR files are installed in the same manner as WAR files.
Navigate to Applications -> Install New Application:
If you go to the Applications -> Enterprise Applications page, you should see your application deployed:

If the Application Status is not started (red, not green), then click on the checkbox next to jetexpress link, and click the Start button to start it. Once you see all "green statuses", you are then ready to test your portal.
Go to this link:
http://localhost:9080/jetexpress/portal
You should see the example Jet Express custom portal:

In section 5, we demonstrated how to deploy all WAR file. In section 6, we demonstrated how to deploy in a single EAR file. The third choice is to deploy Jetspeed and your portlet applications in two or more EAR deployment files.
Advantages:
The deployment of two or more EAR files is not covered by this document. All the steps required can be found in sections 3, 4, and 5. You will still need to install the shared libraries as defined in section 4. Additionally, you will need shared library references for each EAR deployment file. Follow the directions in section 4 for configuring shared libraries and shared library references, as they apply to EAR files in the same way as for WAR files.
Extensions for the portlet deployment descriptor specific to Websphere Application Server are defined within a file called ibm-portlet-ext.xmi. This deployment descriptor is an optional descriptor that you can use to configure WebSphere extensions for the portlet application and its portlets. For example, you can disable the PortletServingServlet servlet for the portlet application in the extended portlet deployment descriptor. The ibm-portlet-ext.xmi extension file is loaded during application startup. If there are no extension-files specified with this setting, the portlet container's default values are used. The default for the portletServingEnabled attribute is true. The following is an example of how to configure that a PortletServingServlet servlet is not created for any portlet on the portlet application.
<?xml version="1.0" encoding="UTF-8"?>
<portletappext:PortletApplicationExtension xmi:version="1.0"
    xmlns:xmi="http://www.omg.org/XMI"
    xmlns:portletappext="portletapplicationext.xmi"
    xmlns:portletapplication="portletapplication.xmi"
    xmlns:xsi="http://www.w3.org/2001/XMLSchema-instance"
    xmi:id="PortletApp_ID_Ext"
    portletServingEnabled="false">
  <portletappext:portletApplication href="WEB-INF/portlet.xml#myPortletApp"/>
</portletappext:PortletApplicationExtension>
Find more information about Websphere porlet extensions here:
When URL addressability is enabled, portlet names must not be the same as any servlet in the same web application. If URL Addressability is not needed, this name requirement is not needed. A fix is required to switch off name validation if URL addressability is disabled.
When URL addressability is disabled, the validation test if port let names match servlet names must also be disabled. With this fix and URL addressability disabled, a portlet application can be installed also if having the same portlet name as a servlet.
The fix for this APAR is currently targeted for inclusion in fix pack 6.1.0.4.
| Revision | Date | Author | Comments |
| 0.1 | 2005-01-21 | David Sean Taylor | Initial draft |
| 0.2 | 2006-01-10 | Ate Douma | Further refinements and cleanout of unused sections |
| 0.3 | 2006-01-10 | David Sean Taylor | Express refinements |
| 0.4 | 2006-10-16 | David Sean Taylor | Websphere 6.1 testing |
| 0.5 | 2006-10-16 | David Sean Taylor | Upgrade to 6.1.0.2, complete WAR section, start on EAR section |
| 0.6 | 2006-10-23 | David Sean Taylor | Complete EAR sections |